


How to Build a DIY Barn Door With a Shiplap Design

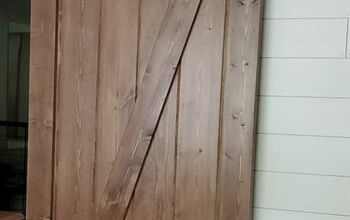
I recently completed a DIY barn door project, and I couldn't be more thrilled with the results. Not only did I save a substantial amount of money by crafting it myself, but I also got to tailor it to my specific needs and design preferences.
In this step-by-step tutorial, I will guide you through the entire process of creating your very own barn door. I began with 1x3 pine for the frame, and I'll share all the tips and tricks I learned along the way to help you build a beautiful barn door that you'll be proud of.
Tools and materials
- 1x3 pine boards (number will depend on the size of your door)
- Shiplap boards
- Wood glue
- 1 ¼-inch brad nails
- Circular saw or miter saw
- Measuring tape
- Carpenter's square
- Sandpaper (various grits)
- Stain or paint of your choice
- Paintbrush or rag
- Sawhorses or a sturdy work surface
- Safety goggles
- Ear protection
- Dust mask
Steps
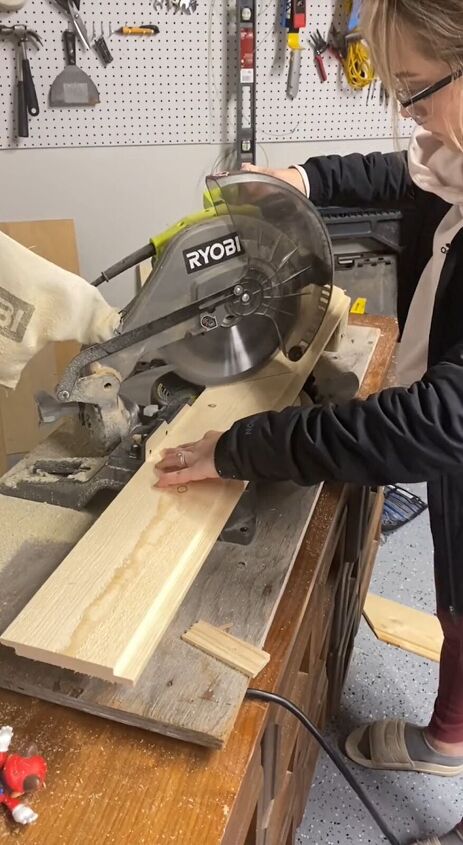
Step 1: Measure and Cut the Frame
Measure the dimensions for your barn door. Standard sizes are 36" x 84" or 42" x 96", but adjust as needed. Use a circular saw or miter saw to cut the 1x3 pine boards to create the top, bottom, and side frame pieces according to your measurements. Ensure all pieces are cut at 90-degree angles.
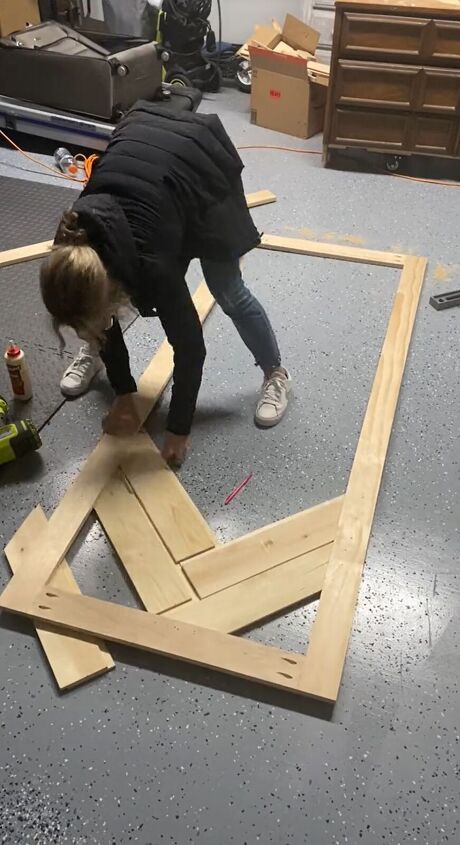
Step 2: Assemble the Frame
Lay the top and bottom frame pieces parallel to each other on your work surface. Position the side frame pieces vertically, forming a rectangular frame.
Apply wood glue to the ends of the side pieces and attach them to the top and bottom pieces. Use a carpenter's square to ensure the frame is perfectly square. Secure the frame with 1 ¼-inch brad nails.
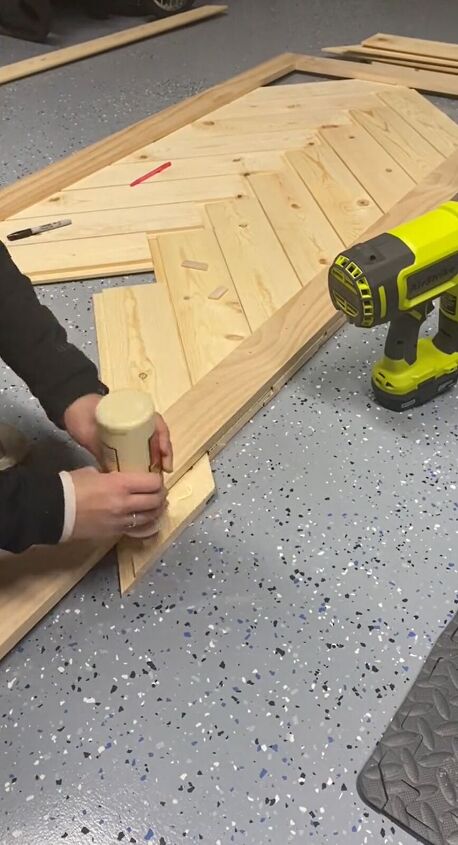
Step 3: Add the Shiplap
Lay your frame on your work surface with the front side facing down. Apply wood glue to the back of the shiplap boards.
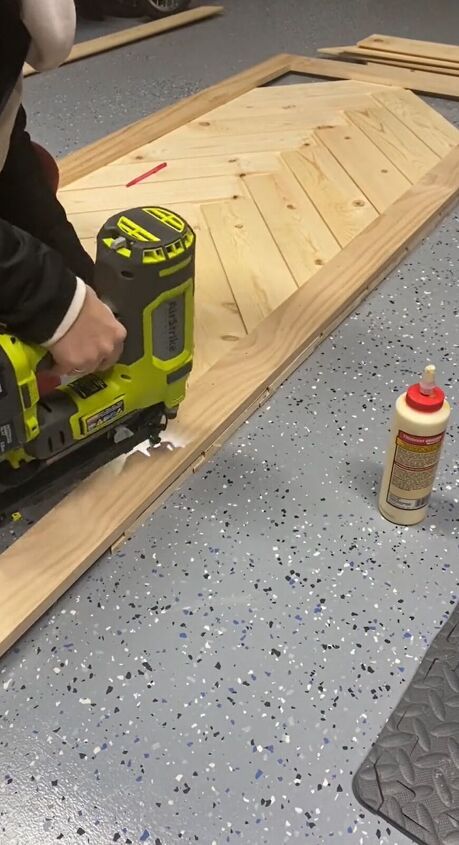
Position the first shiplap board flush with the top of the frame and secure it with brad nails.
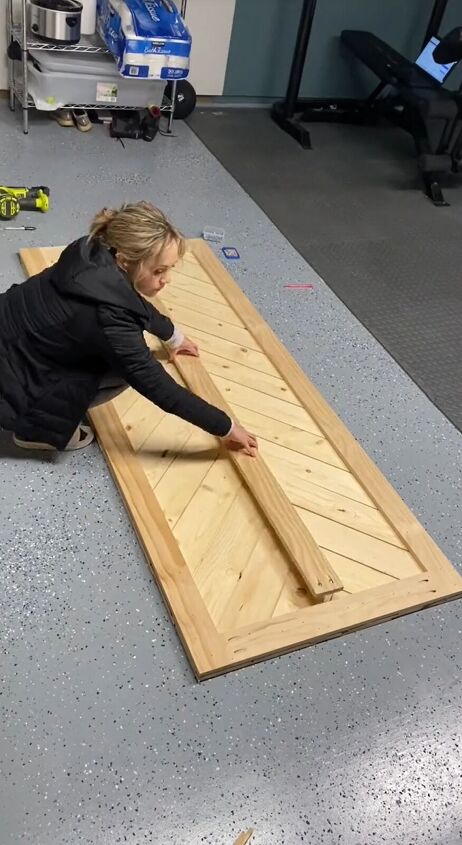
Continue adding shiplap boards, ensuring they are tightly joined. For the final board, place it in the middle to serve as a visual guide.
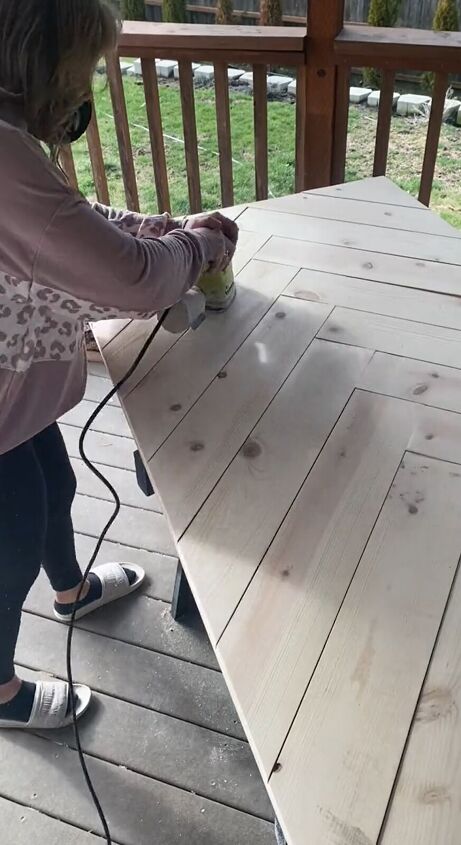
Step 4: Sanding and Prep
Use various grits of sandpaper to smooth any rough edges and imperfections on the front and sides of the door. Pay special attention to the corners and edges to create a distressed, rustic look if desired. Don't forget to wear safety goggles, ear protection, and a dust mask during sanding.
Step 5: Staining or Painting
Choose a stain or paint color that matches your design preferences. Apply the stain or paint evenly to the front and sides of the door using a paintbrush or rag.
Allow it to dry completely according to the manufacturer's instructions. Apply additional coats if necessary to achieve the desired finish.

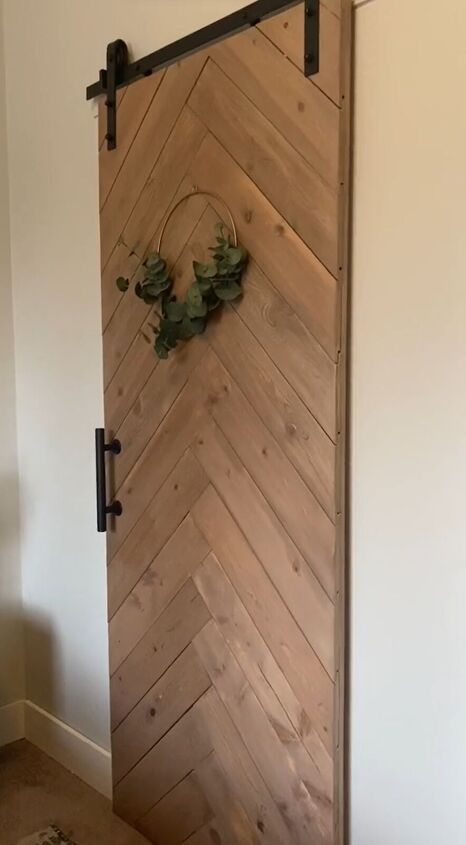
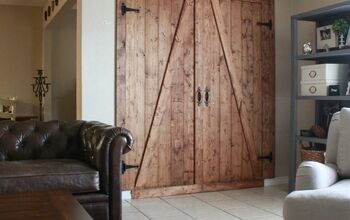
DIY barn door
Congratulations! You've successfully completed your DIY barn door. By following this step-by-step tutorial, you not only save money but also gain the satisfaction of creating a beautiful and functional piece of decor.
Feel free to customize it to match your style and preferences. Whether you're using it as a sliding door for a closet, room divider, or decoration, your DIY barn door is sure to impress. Enjoy your newly crafted barn door!
Follow @gatheratthebooths on TikTok for more DIY ideas.
Comments
Join the conversation
-
Nice one, thanks for sharing the process. The vid is fun, btw! 😀
- See 1 previous
-
Hi! How did you do the herringbone pieces?


Frequently asked questions
Have a question about this project?