


How to Make DIY Dry-Erase Boards for Doors Out of Shelves
Creating a DIY dry-erase board by transforming an old shelving unit is a creative and rewarding project. I'll share my journey of making custom dry-erase boards using 1x3s, pocket screws, and a few other essential tools.
Follow along as I guide you through the process, sharing tips and insights for a successful project.
Tools and materials
- 1x3s
- 1/4 inch plywood
- Dry erase hardboard
- Concealed hinges
- Liquid nails
- Paint
- Handles
- Pocket screws
- Table saw
- Kreg hinge jig
- Paintbrush
Steps
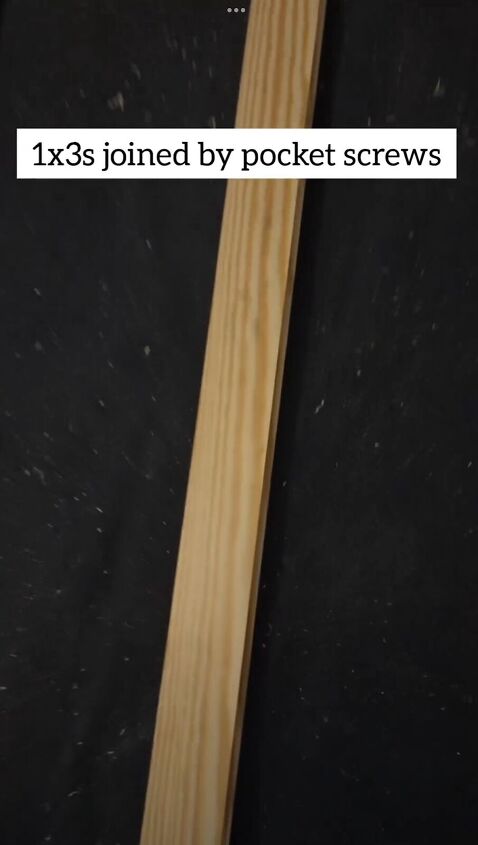
Step 1: Constructing the Frame
Start by assembling the frame using 1x3s joined with pocket screws. This step sets the foundation for the dry-erase boards, providing a sturdy structure to build upon.
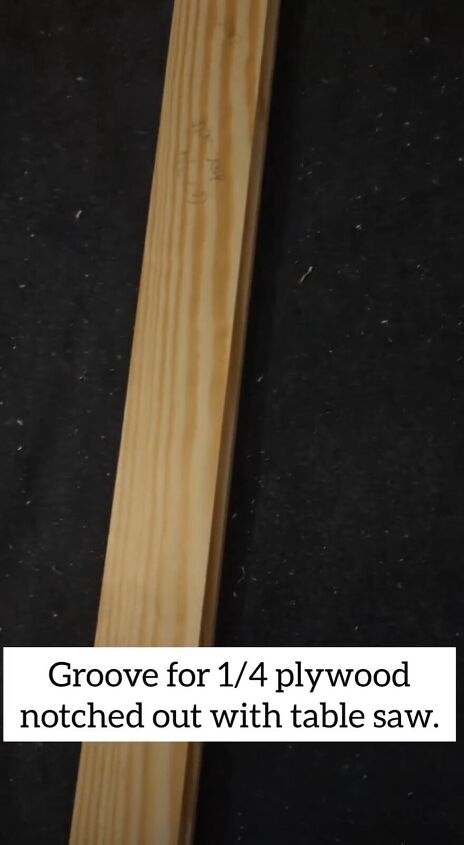
Step 2: Creating a Groove for Plywood
Utilize a table saw to create a groove in the frame for the 1/4-inch plywood. Precision is key in this step to ensure a snug fit for the plywood. Take your time and notch out the groove carefully.
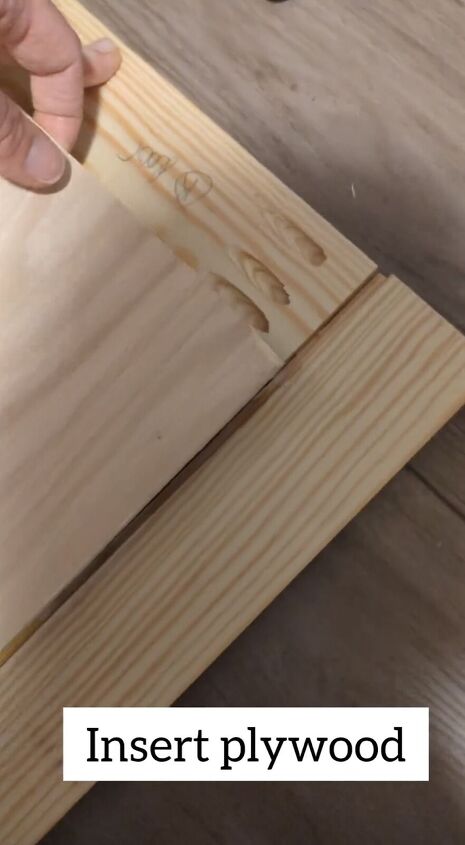
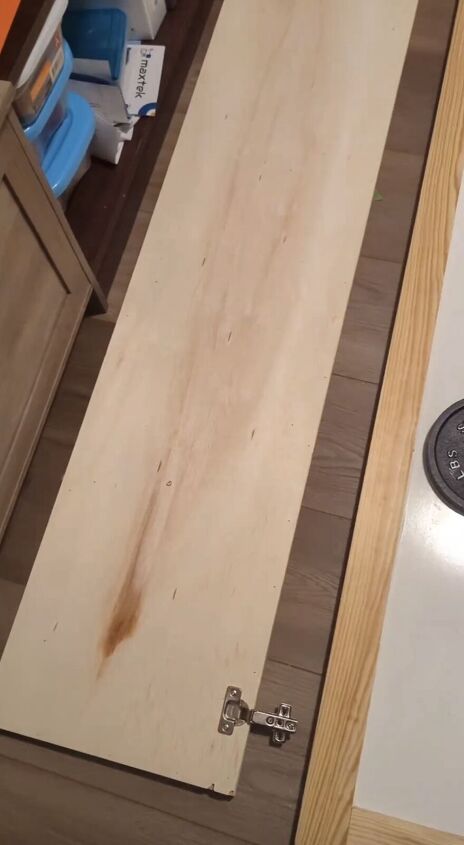
Step 3: Inserting Plywood for Stability
Insert your plywood into the groove.
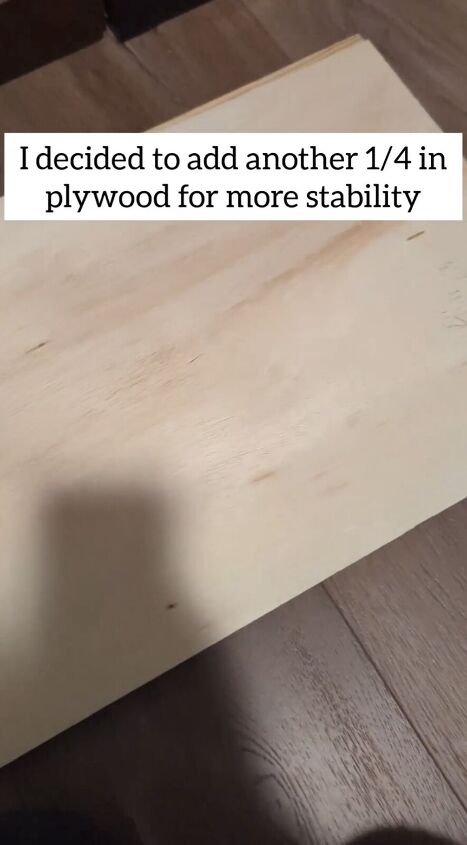
To enhance stability, insert a second layer of 1/4-inch plywood into the groove. This additional layer adds durability and ensures a solid foundation for the dry-erase boards.
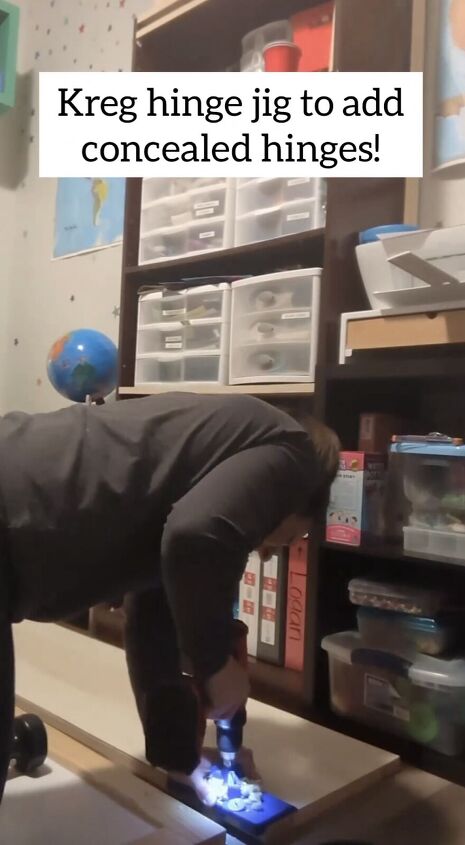
Step 4: Incorporating Concealed Hinges
Use a Kreg hinge jig to add concealed hinges to the dry-erase boards. This step introduces functionality, allowing the boards to fold and unfold seamlessly.
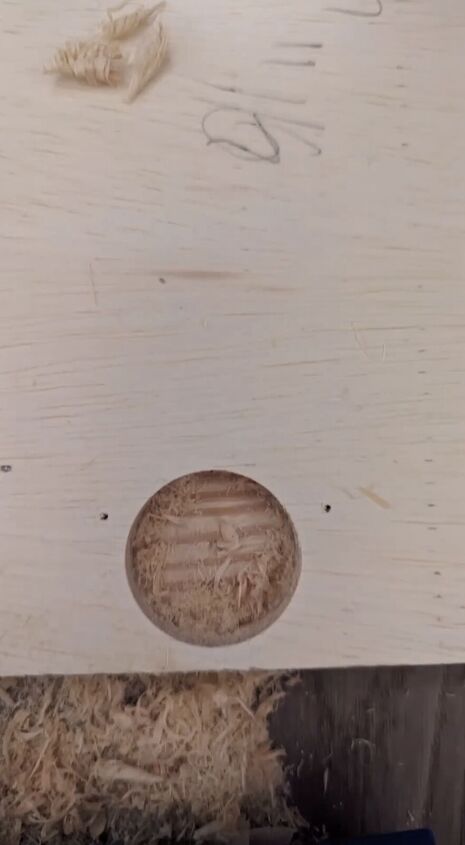
Ensure proper alignment for smooth operation.
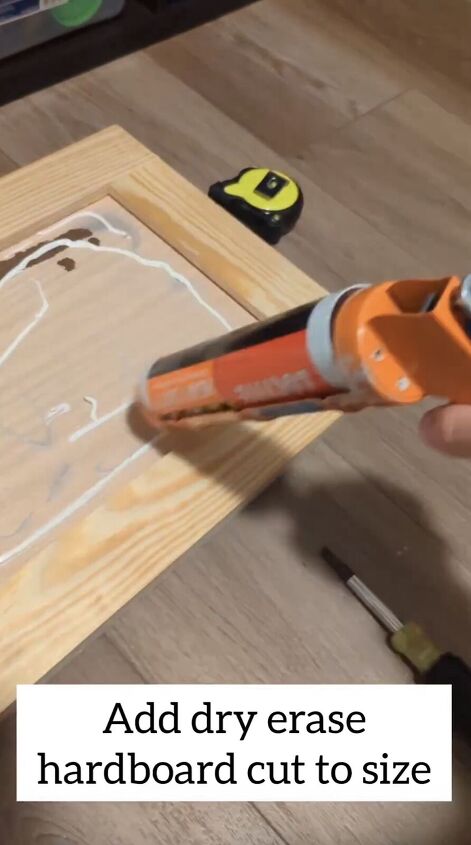
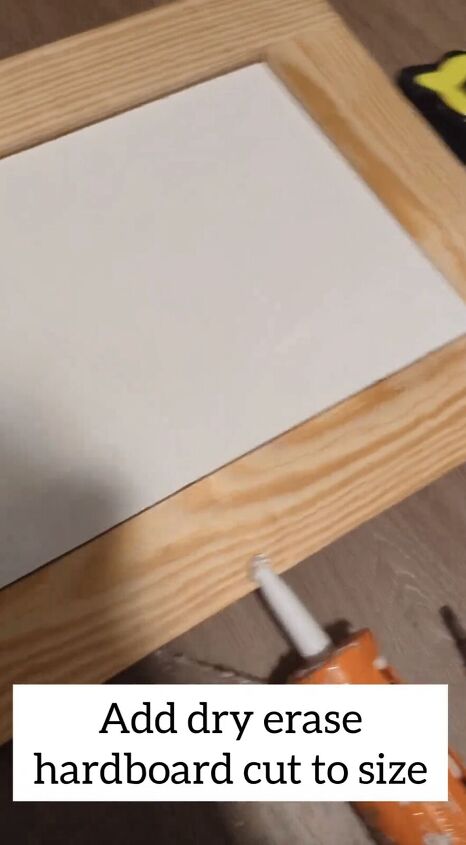
Step 5: Attaching Dry-Erase Hardboard
Cut the dry-erase hardboard to size and attach it to the frame using liquid nails. This material serves as the writing surface for the boards, providing a smooth and erasable canvas for your ideas and notes. Let the adhesive dry completely.
Step 6: Attach Hinges and Completed Doors
Attach the concealed hinges, being careful to screw them in tightly. Attach the doors to the shelving unit.
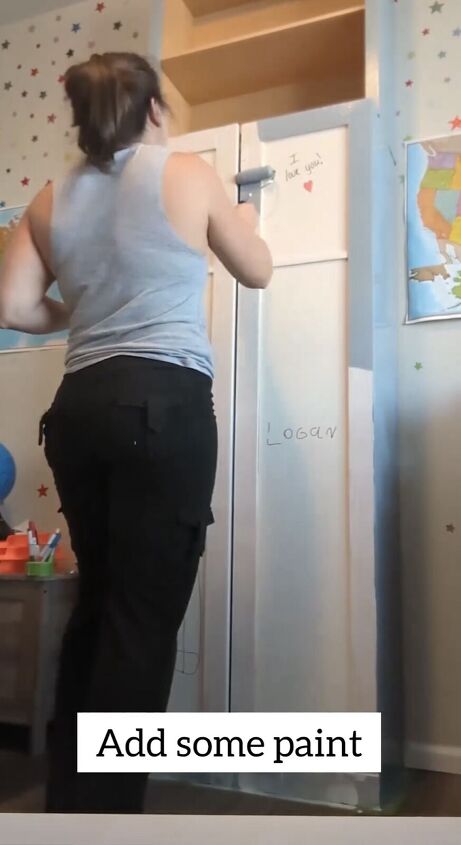
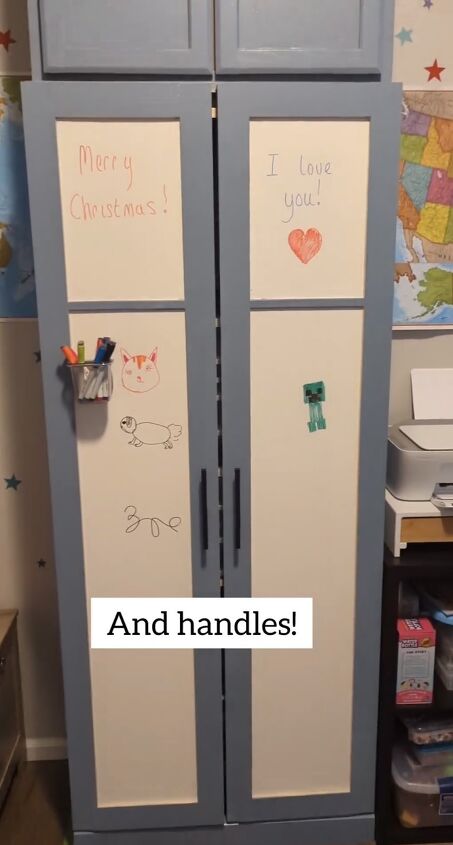
Step 7: Adding Finishing Touches
Bring your DIY dry-erase boards to life by adding your favorite paint and attaching handles for easy handling. Choose a paint color that complements your style and the surrounding decor, creating a cohesive and visually appealing look.
DIY dry-erase board
Crafting a custom DIY dry-erase board from an old shelving unit combines functionality with creativity. By following these step-by-step instructions and using the specified tools and materials, you can achieve personalized dry-erase boards that seamlessly integrate into your space.
Share your latest DIY projects in the comments below.
Follow @diywitherinb on Instagram for more DIY ideas.


Frequently asked questions
Have a question about this project?