


A Festive Twist: How to Craft a Coat Hanger Christmas Tree

It's a chilly December day, rain tapping on the windows, and what better way to spend it than crafting? And with Christmas coming up a holiday craft was a winner in my books.
I stumbled upon this video by Angie Carpenter where she DIYed a Christmas tree from wire hangers. Pure genius. Naturally, I had to give it a shot and put my spin on it.
So, let me show you how I made my coat hanger Christmas tree in less than an hour.
Tools and Materials:
- 6 wire hangers
- Tape, zip ties or pipe cleaners
- 2 mesh shower sponges
- 1 pack of battery-operated fairy lights
Hometalk may receive a small affiliate commission from purchases made via Amazon links in this article but at no cost to you.
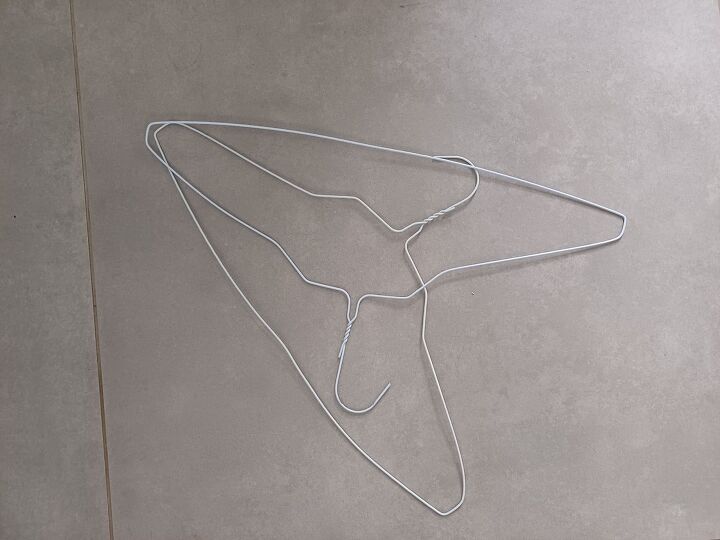
1. Build the Frame
Pair up your hangers, laying them out with the bottom facing out and the hooks toward the middle.
Connect them at the top, the two outer sides, and the two hooks in the middle.
Repeat twice more with your remaining sets. I used a combo of tape and zip ties to secure my tree, but pipe cleaners work just as well.

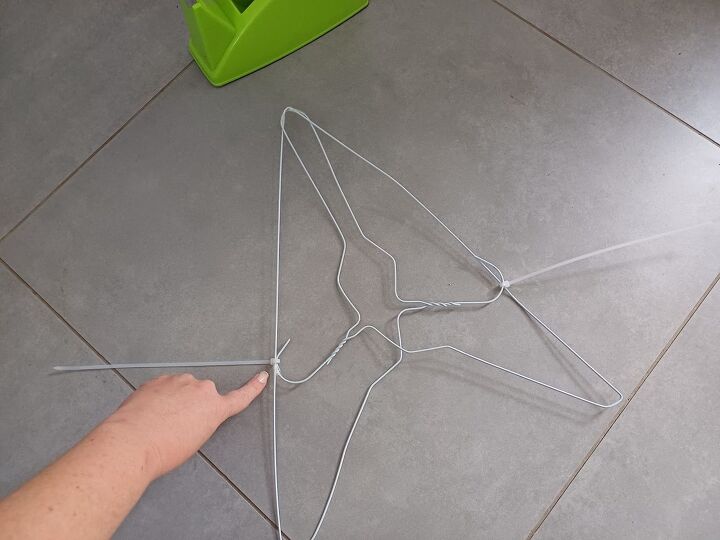
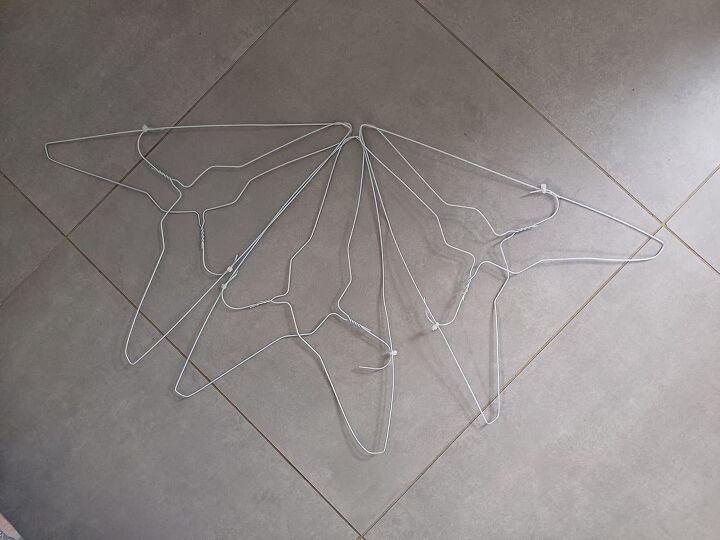
Stand one set up and slip a second set inside it in the middle. Connect these with your zip ties or pipe cleaners.
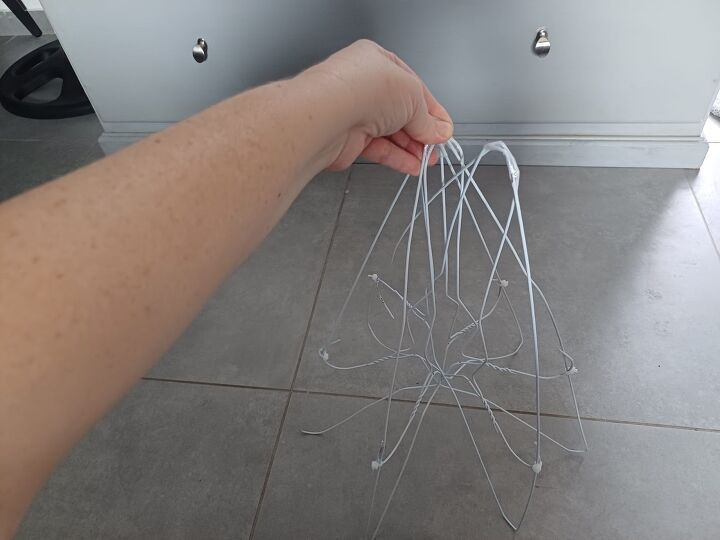
Do the same with the third set. Again connect all three so they do not come apart.

You now have a coat hanger Christmas tree frame.
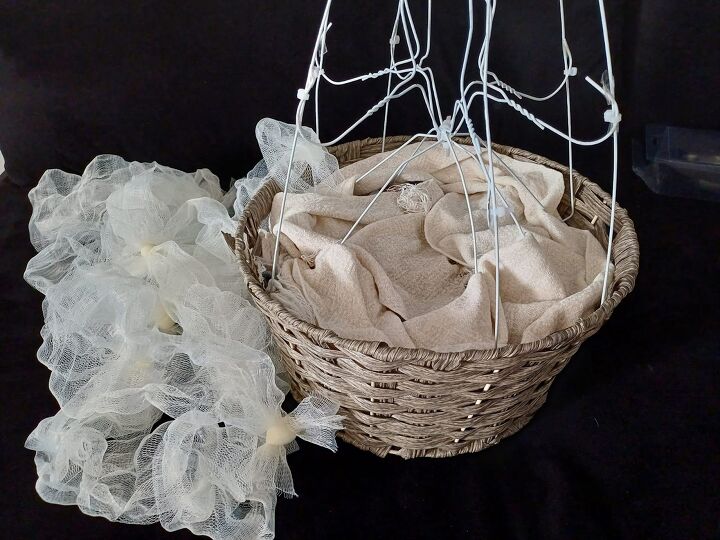
2. Place in a Container
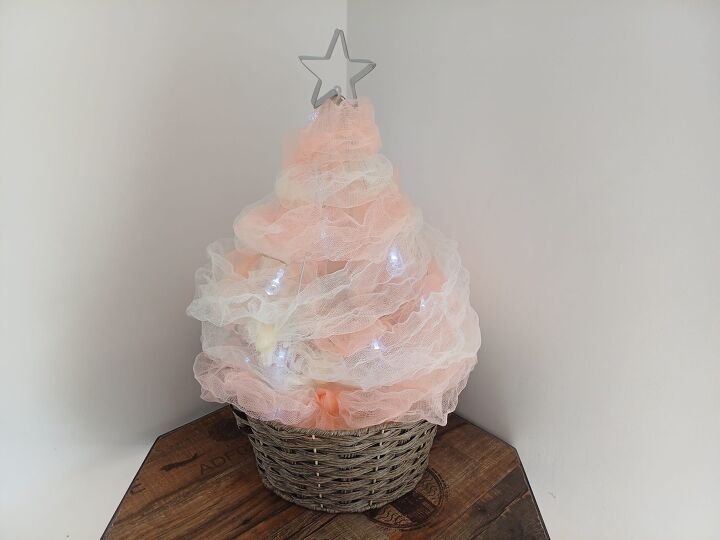
Choose a container for your tree to stand in; I went with a basket. Fill it up with newspaper or whatever's on hand. Place your DIY Christmas tree frame inside the box, and remember to disguise the filler. I used a cream woolen scarf.
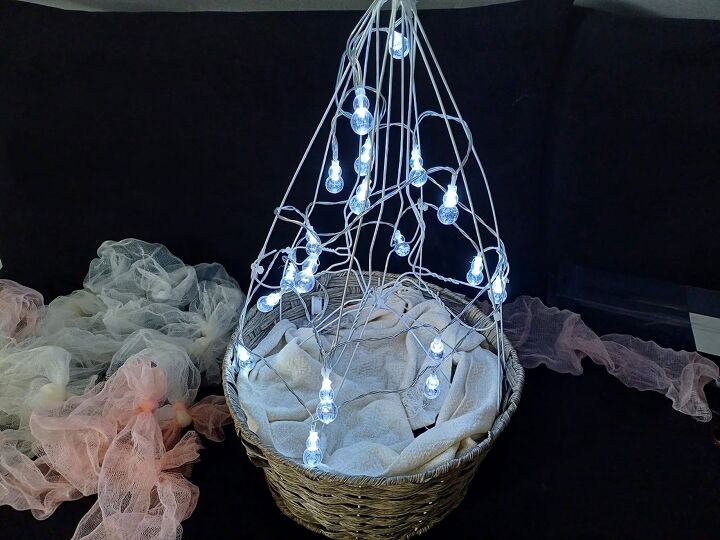
3. Add Your Lights
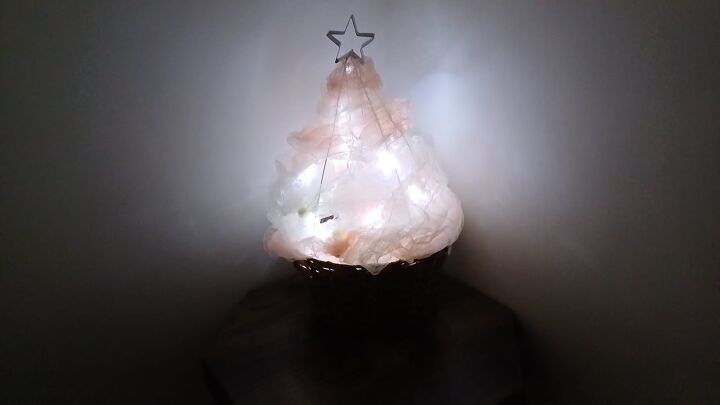
Now illuminate your creation. I opted for battery-operated fairy lights, concealing the battery pack inside the basket. Starting at the bottom and finishing on top, I wrapped the lights around the frame.
4. Time to Decorate
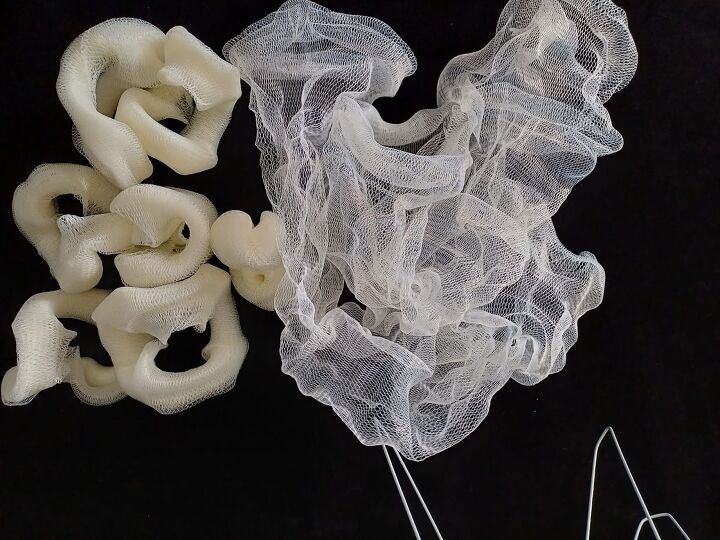
This year, I'm all about the Pinkmas trend, but I wanted a more subdued vibe. With no luck finding baby pink and cream mesh ribbon, I raided the bathroom aisle for mesh shower sponges.
Unravel the mesh sponges to get a bunch of circles, which you stretch out to form longer pieces.
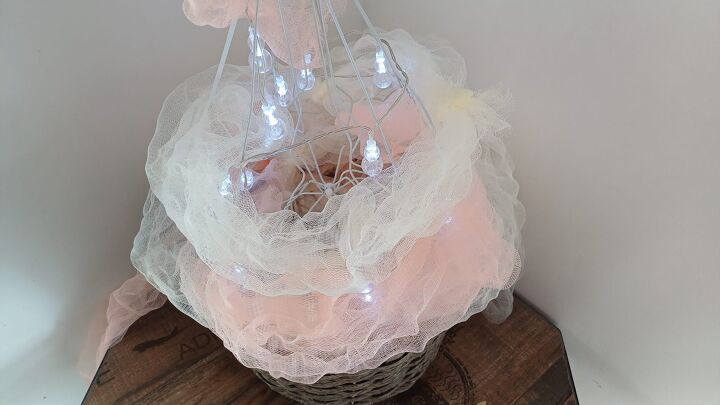
Wrap these around your tree, starting at the bottom and working your way to the top.
Get creative here—you can use tinsel, burlap, or thick mesh ribbon to wrap your tree, let your imagination run wild.
5. End with a Star
For the finishing touch, crown your tabletop Christmas tree with a star. I used a cookie cutter and zip-tied it to the top.
And there you have it, my DIY mini Christmas Tree.
More DIY Christmas Trees
Coat Hanger Christmas Tree Tutorial
I love that this is something you can personalize. Each person's tree will be different.
Now, the big question: What to display it with? Any ideas? I'm considering getting some rose gold baubles and bottle brush trees. What are your thoughts?
If you give this a whirl, I'd love to see how you decked out your wire hanger Christmas tree. Share your creations!
Comments
Join the conversation
-
This is a cute idea, perhaps especially for those who live in small spaces or in a bedroom or entryway. I can see many ways of making this different, as you point out. Yours is very sweet and feminine, may it bring you pleasure throughout the season. Thanks for sharing.
-
CONGRATULATIONS! You have professionally represented the State of Oklahoma and the winningest football team in college football, over 700 wins with Alabama currently 56 wins behind. THANK You


Frequently asked questions
Have a question about this project?