


How to Make Festive Fringe Ribbon Christmas Trees

I'm back with another easy Christmas DIY that you can make for your holiday-tiered tray or table centerpiece! You can make these cute fringe ribbon trees in minutes. I picked green fringe but there are many other colors available.

Tools and materials:
- Posterboard
- Scissors
- Hot glue gun
1. Make the cone
I used plain old posterboard that I had with my art supplies to make cones as the base for my trees. You could also use a shirt box, or a cereal box, or pick up a lightweight posterboard at Dollar Tree.
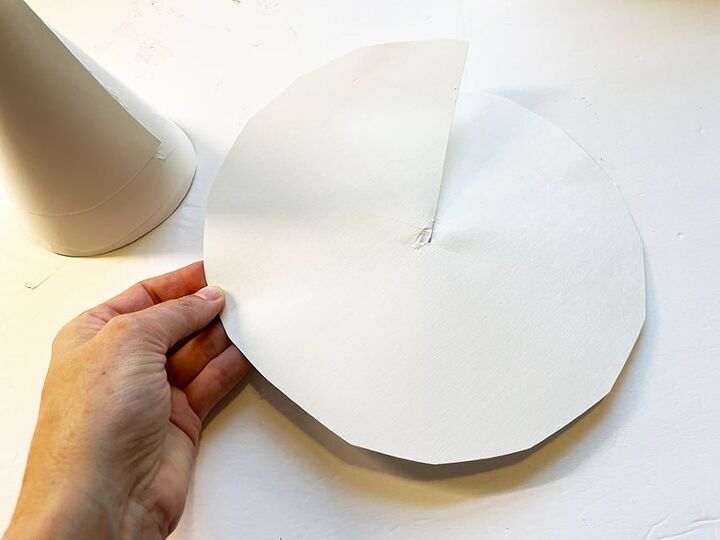
To make the cones, you’ll need to cut circles with a slit to the center of lightweight cardboard (shown above).
Your circles do not need to be perfect but do make them about 9-11 inches in diameter and use hot glue to glue each cone together. Cut the base of your finished cones down if needed to make trees of varying heights.
Side Note: I originally started this project using foam craft cones but the ones I had were flat on the top. Let's just say that the foam cones fell flat and I highly recommend making your own out of cardboard.
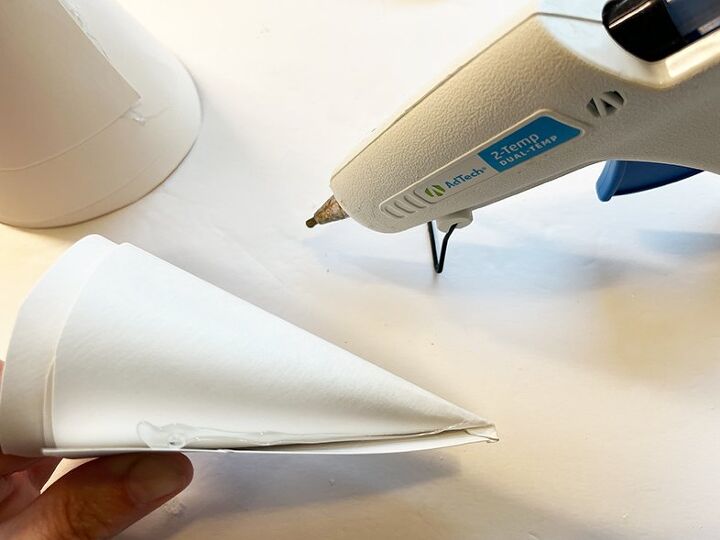
Here's how my cones look after hot gluing at the sides.
Note: This is one of 10 easy DIYs you can make for your Holiday Tiered Tray. If you'd like to see more, check out the full blog post here... 10 Christmas Tiered Tray Ideas – Easy DIYs
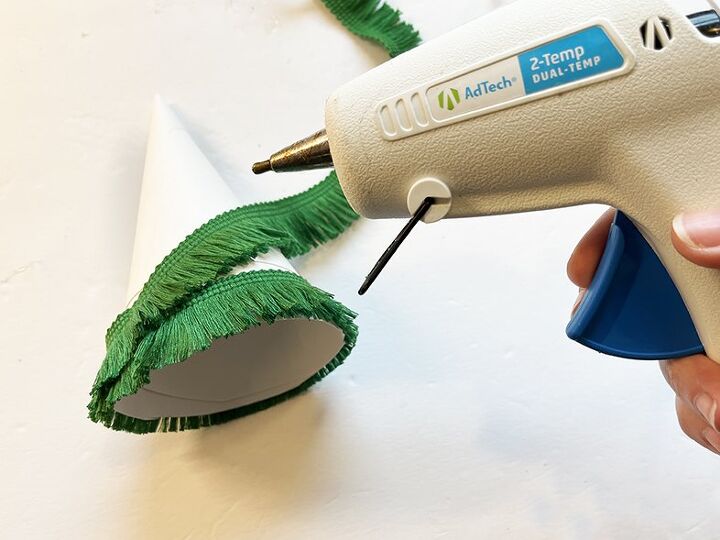
2. Hot glue the fringe ribbon onto the cones
Now for the fun part, making trees!
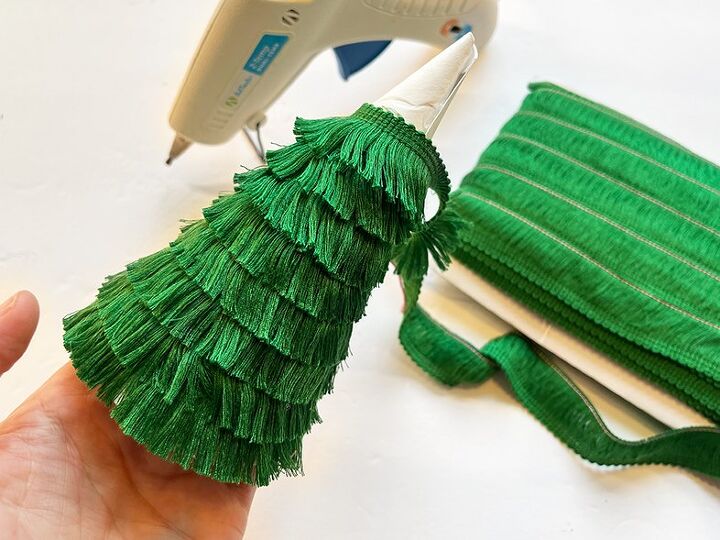
I'm using 1-inch fringe ribbon for this DIY. I found bulk rolls on Amazon but you could also check your local craft store. This ribbon comes in lots of different colors and you can get the link in my original post here... 10 Christmas Tiered Tray Ideas – Easy DIYs
To make a tree, start by wrapping fringe ribbon around the base of your cone. Work up using dabs of hot glue to secure the fringe as you go in layers.
3. Remove the string
Here's another photo of the process. I didn't cut the ribbon from my reel until the end because I wasn't sure how much I would need. There was also a small string to pull as I worked.
The string was just there to hold the fringe straight before use and it was easy to pull and remove as I worked.
When you're done, your fringe may be a little messy looking but don't worry, you can use a comb to fluff up your trees at the end.

I hope you love this easy holiday craft. Happy holidays and happy crafting!
DIY Christmas Decorations
Comments
Join the conversation
-
These are so fun! I have some white upholstery fringe I may try this with!


Frequently asked questions
Have a question about this project?