


How to Make a Stylish DIY Wood Tray in a Few Easy Steps

I'm thrilled to share with you a step-by-step guide on how to create a cute and stylish DIY wood tray. This project is fun and simple to make. So, let's dive into the details.
Tools and Materials
- Wood rounds
- Wood beads
- Wood stain
- Hot glue gun and glue sticks
How to make a DIY wood tray
Step 1: Gather Your Materials
Before we begin, make sure you have all the materials listed above. Having everything at hand will make the process smooth and enjoyable.
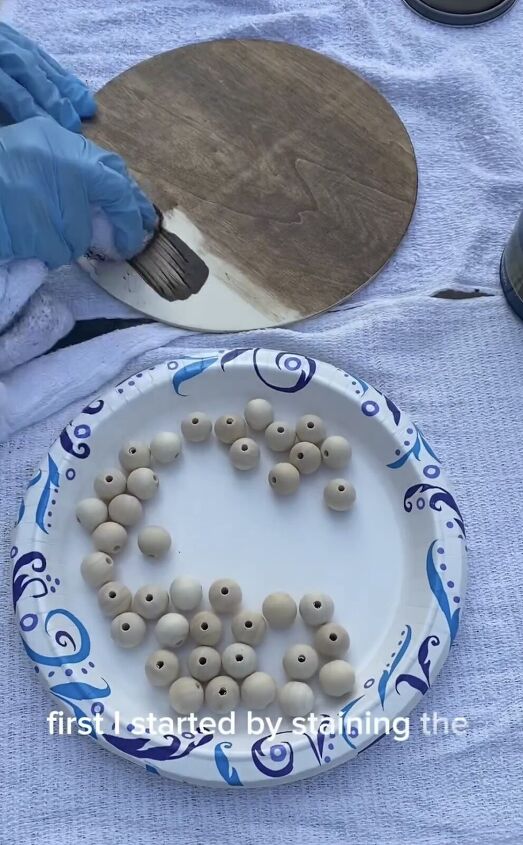

Step 2: Stain the Wood Rounds and Beads
Start by staining the wood rounds and beads. You can find the link for these items in my saved stories. Choose a stain color that complements your home decor. Allow the stain to dry completely before moving on to the next step.
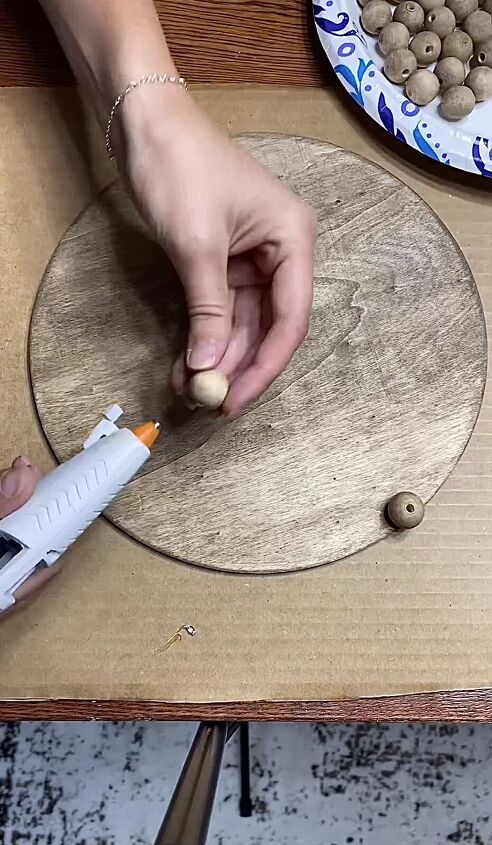
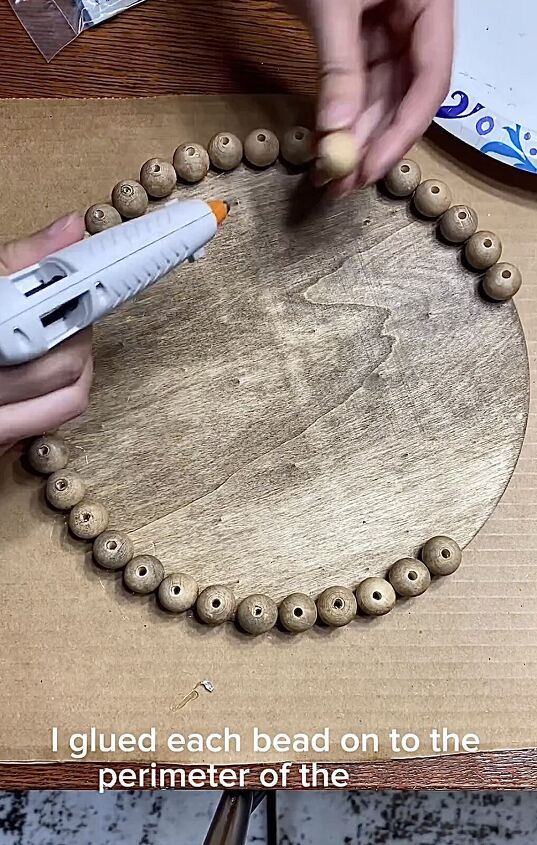
Step 3: Arrange and Glue the Beads
Once the stain is dry, it's time to get creative! Take each wood bead and apply a small amount of hot glue to one side. Carefully place the beads around the perimeter of the wood circle, ensuring an even spacing. Press each bead firmly onto the wood to secure it in place.
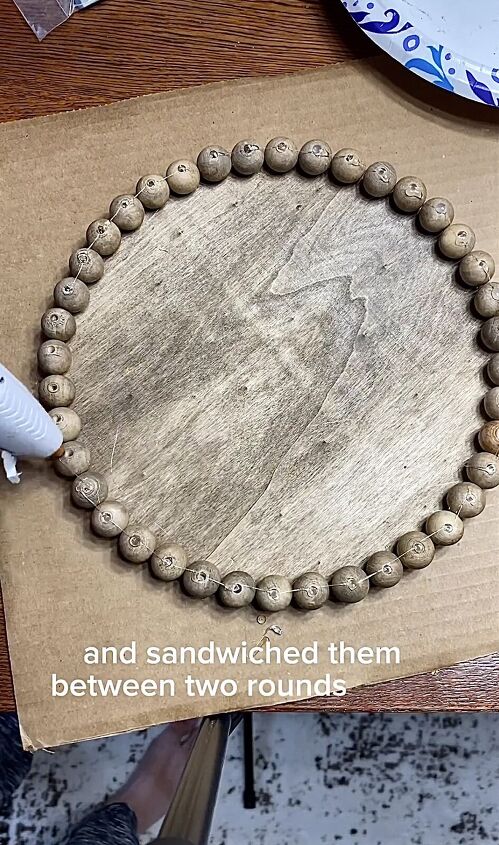
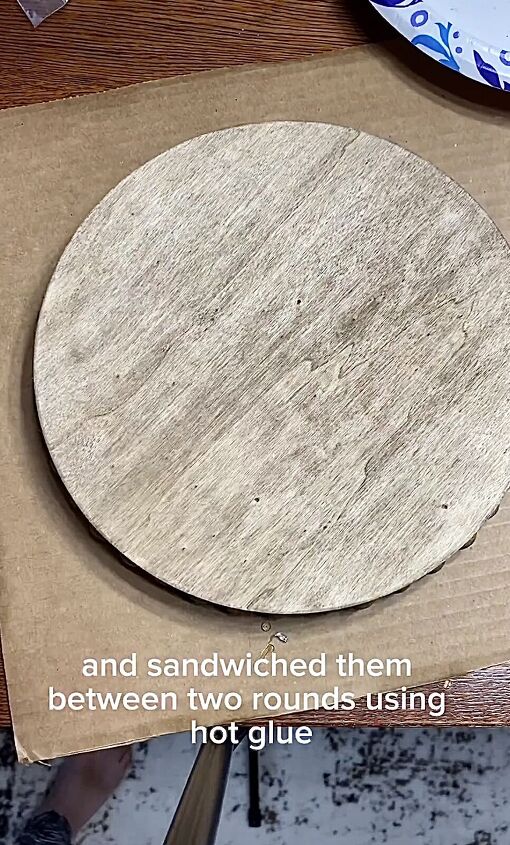
Step 4: Create the Tray Base
After gluing the beads, apply a bead of glue around the perimeter. Then take another wood round and apply hot glue around its edge. Carefully place it on top of the beads, creating a sandwich effect. This step not only adds stability to your tray but also gives it a polished and finished look.
Allow the glue to dry completely.
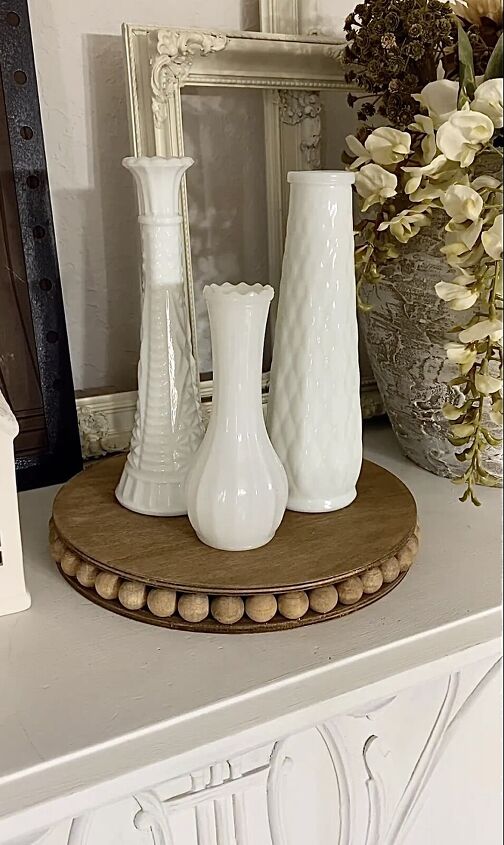
The contrast between the stained wood and the beads creates a visually appealing and unique piece.
DIY wood tray
I'm sure your wood tray turned out amazing! I hope you enjoyed creating this as much as I did. Share your version of this project in the comments below. I'd love to see your take on this project.
Follow @wilsonfarmandhome on Instagram for more DIY ideas.


Frequently asked questions
Have a question about this project?