


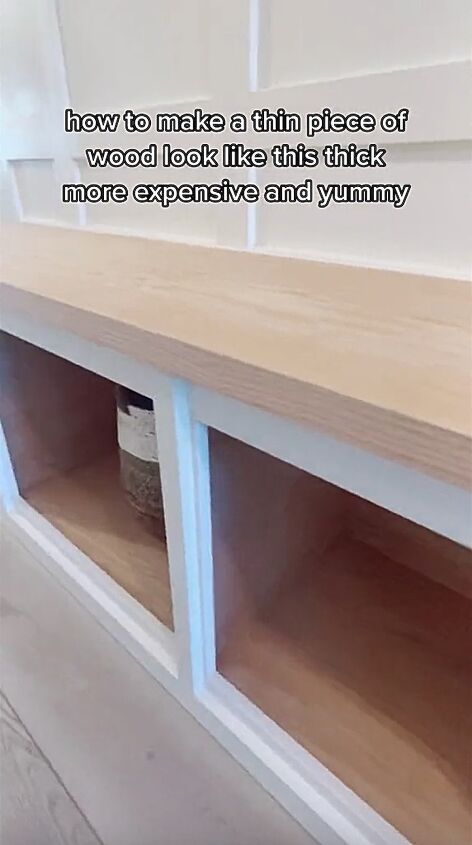
Edge Banding Hack: How to Easily Trim & Apply Edge Banding

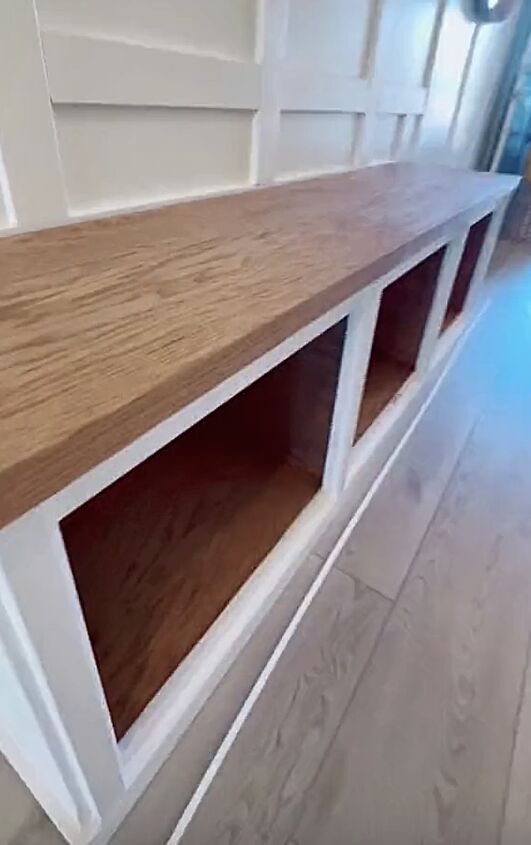
Transforming a thin piece of wood into a thick, expensive-looking masterpiece is easy with edge banding!
You can find edge banding at any home improvement store. This versatile material is the secret to achieving a thicker and more expensive appearance for your wood.
Tools and materials
- Thin pieces of wood
- Edge banding
- Iron
- Razor blade
- Sandpaper
- Screwdriver
- Stain or paint
How to apply edge banding
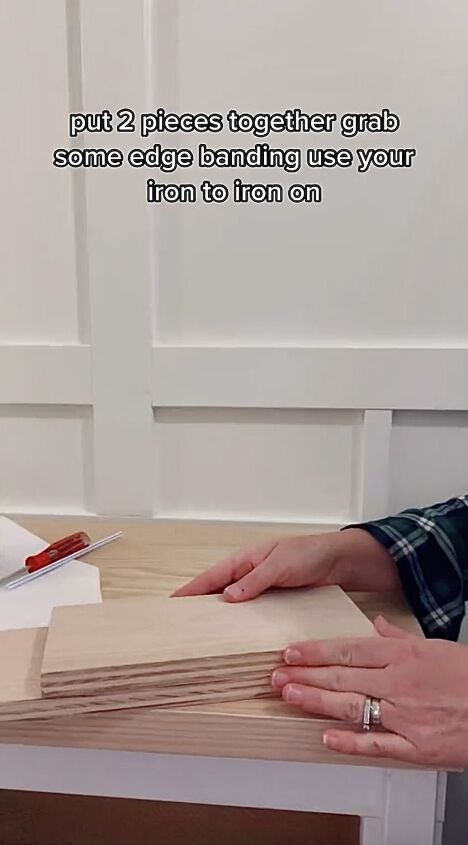
Step 1: Prepare Your Wood
Begin by placing two thin pieces of wood together. Make sure they are aligned perfectly to create a seamless and sturdy surface.
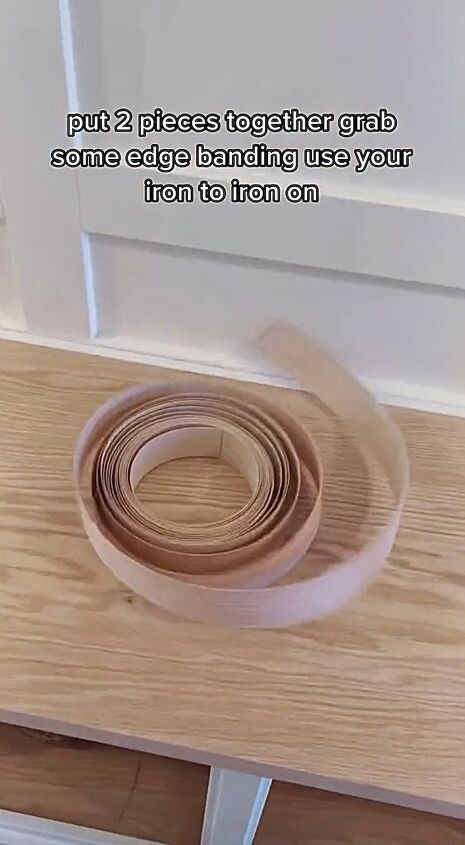
Step 2: Gather Your Edge Banding
Measure the length and thickness of your wood. Have enough edge banding on hand to allow for trimming.
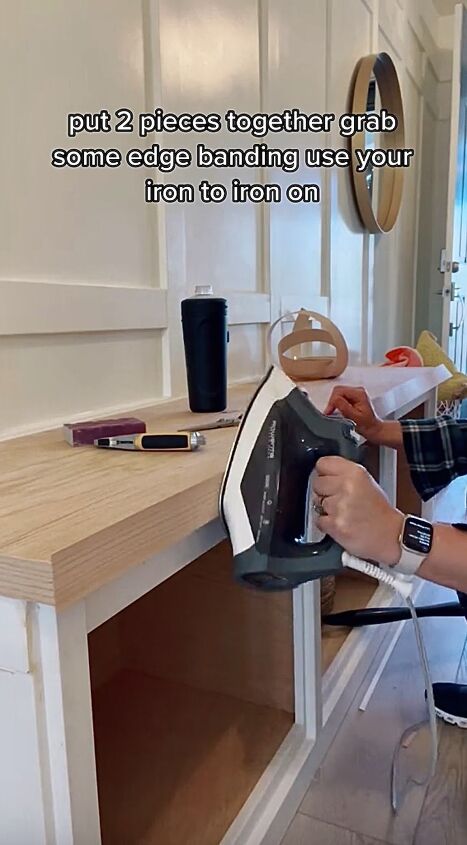
Step 3: Iron On the Edge Banding
Using your iron, carefully apply heat to the edge banding. This will activate the adhesive on the banding and allow it to bond securely to the edges of your wood. Move the iron slowly and evenly to ensure proper adhesion.
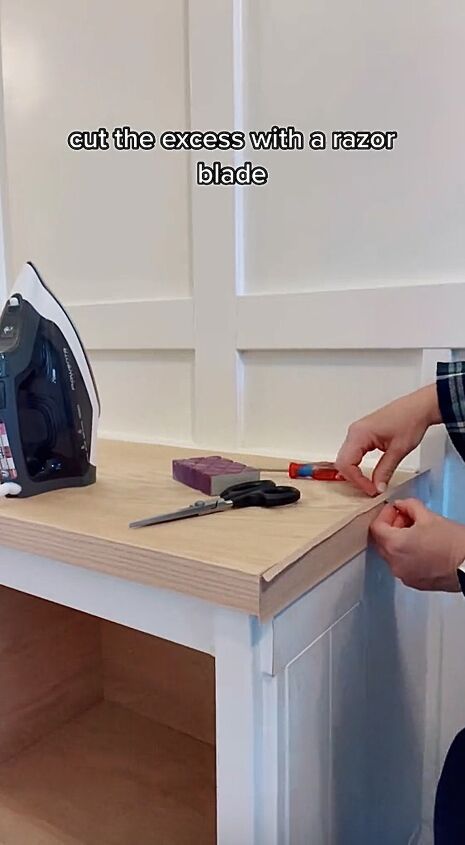
Step 4: Trim Excess with a Razor Blade:
Once the edge banding is attached, use a razor blade to trim off the excess. Gently run the blade along the edge, following the natural contour of the wood. Take your time to achieve clean and precise cuts.
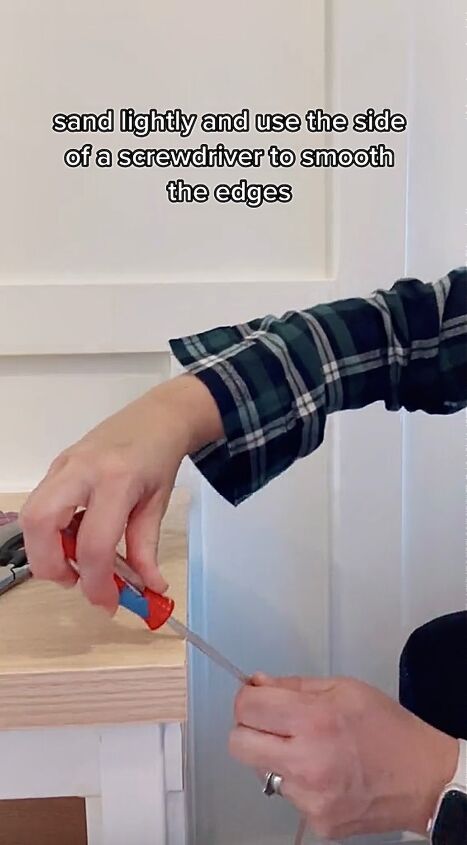
Step 5: Light Sanding
After trimming, lightly sand the edges to smooth out any rough spots. This step ensures that your project has a professional finish and feels good to the touch.
Step 6: Use a Screwdriver Along the Edges
Take the side of a screwdriver and run it along the edges. This technique helps to further smooth and round the edges, giving your wood a polished look. Be gentle to avoid any splinters or damage to the edge banding.
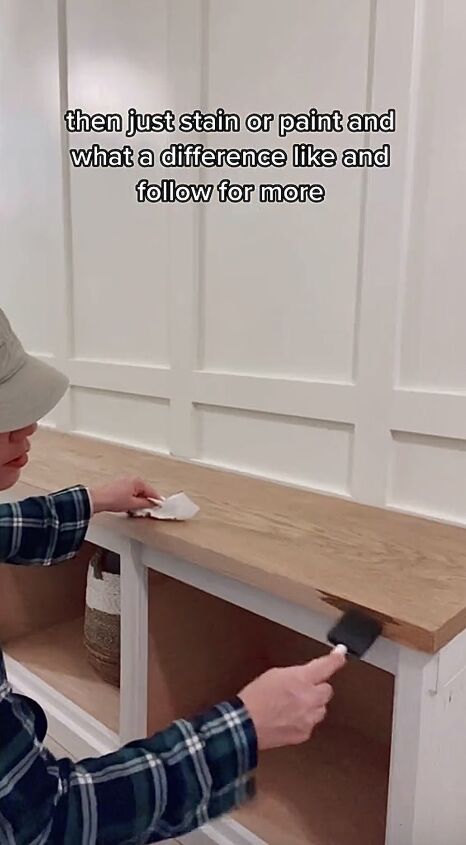
Step 7: Stain or Paint
Apply your chosen stain or paint to the wood. This is where you can let your creativity shine. Experiment with different colors and finishes to achieve the desired aesthetic. Let the stain or paint dry and cure for at least 24 hours.
How to trim & apply edge banding
Whether you're crafting furniture or enhancing home decor, this edge banding technique is a game-changer for elevating the appearance of thin wood. What are you working on that uses edge banding? Share your projects in the comments below.
Follow @juliecarmonahome on TikTok for more DIY ideas.


Frequently asked questions
Have a question about this project?