


How to Makeover a Vase With Acrylic Paint & Baking Soda

This DIY acrylic paint and baking soda vase transformation recipe has been viral on Pinterest. I’m pretty happy with how these two vases turned out. You can find different recipes online but I only used acrylic paint and baking soda. After the second coat, I rubbed in some dirt. Here are the quick and easy steps:
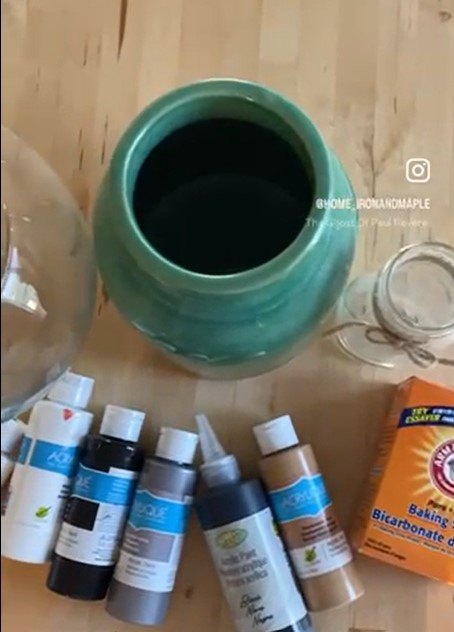
Tools and materials
- Old vase
- Acrylic paint (colors of your choice)
- Baking soda
- Dirt (optional)
- Paintbrushes (different sizes)
- Water
- Paper towels, sponge, or rags
- Protective surface (newspaper or plastic sheet)
- Mixing palette or disposable plate
- Mixing stick or old spoon
- Gloves (optional, for mess protection)
Vase makeover with acrylic paint and baking soda
1. Prepare your workspace
Lay down a protective surface like newspaper or a plastic sheet to catch any paint drips. Make sure your vase is clean and dry before starting the transformation. Gather your supplies.
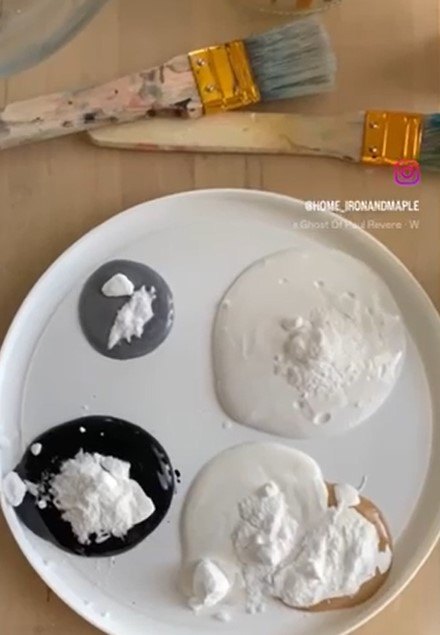
2. Mix paint and baking soda
On your mixing palette or disposable plate, combine acrylic paint with a small amount of baking soda. Start with a 1:1 ratio and adjust as needed. Mix them together until you achieve a paste-like consistency.
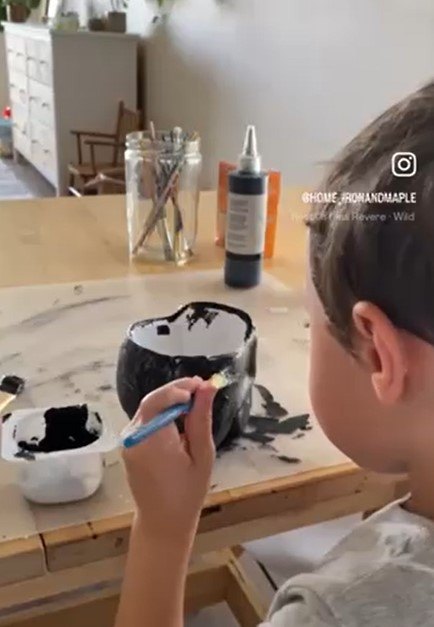
3. Apply the first coat of paint
Put on your gloves if desired. Use a paintbrush to apply the acrylic paint and baking soda mixture onto the surface of the vase. Apply a thin, even coat all over the vase. This might look a bit textured due to the baking soda.
4. Let it dry
Place the vase on a clean surface and allow the first coat to dry completely. This might take a few hours, depending on the thickness of the paint layer.

5. Apply the second coat of paint
Once the first coat is dry, apply a second coat of the acrylic paint and baking soda mixture using a different paintbrush or a clean one. This coat will further enhance the texture and coverage.
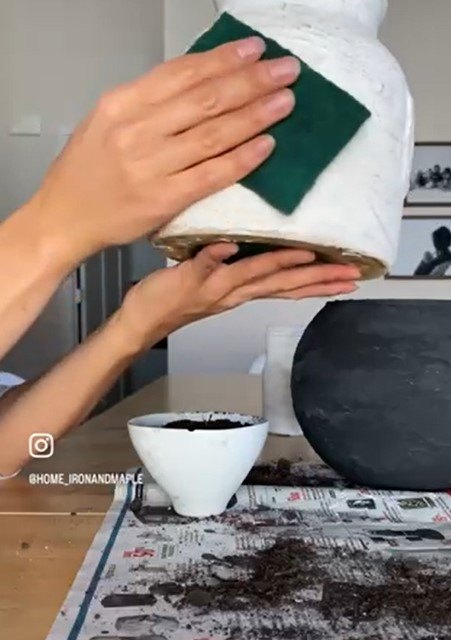
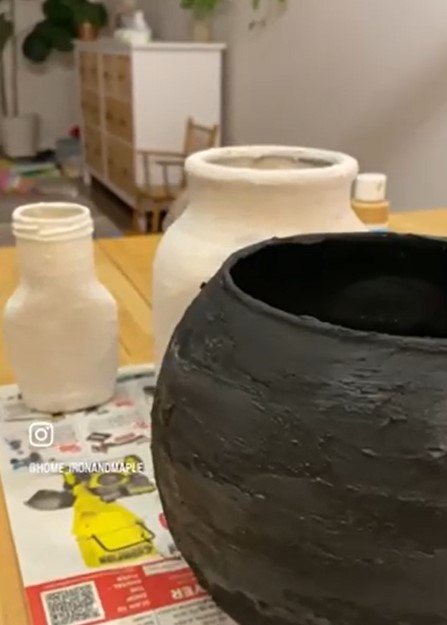
6. Rub in dirt
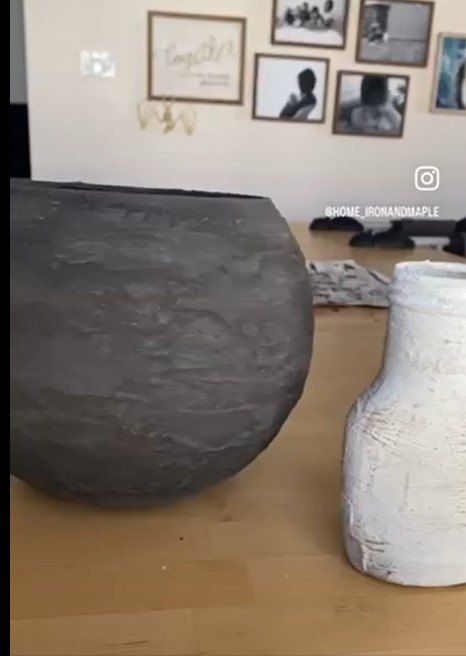
After applying the second coat and while the paint is still slightly wet, use your fingers or a paper towel to gently rub in some dirt onto the surface of the vase. (This is what I did on my white vase.) This will create a weathered and aged appearance. Be creative with where and how you apply the dirt to achieve the desired effect.
7. Let it dry
Allow the second coat, along with the added dirt, to dry completely. This might take another few hours.
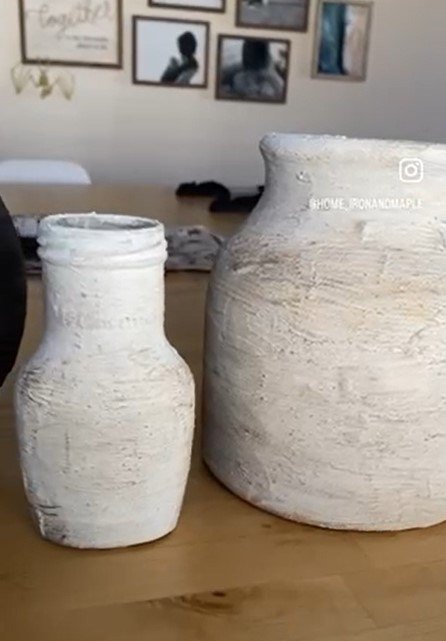
8. Final touches
Inspect the vase to ensure you're happy with the texture and appearance. If you feel the need for more texture, you can add a third coat of the paint and baking soda mixture in the same way as before. Let it dry.
Vase makeover with acrylic paint and baking soda
This technique allows for a lot of creativity so please share with me in the comments what you did to your own vase! You can experiment with different colors of paint, levels of baking soda, and ways of applying the dirt to achieve various effects. It's now ready to add a rustic and unique touch to your décor. Have fun and enjoy the process of giving your vase a fresh, weathered look using just acrylic paint and baking soda!
Follow @home_ironandmaple on Instagram for more DIY ideas.
Comments
Join the conversation
-
Hi Trina! I never done on a can or a plastic, but as long as you spray paint it first, the paste should stick;)


Frequently asked questions
Have a question about this project?