


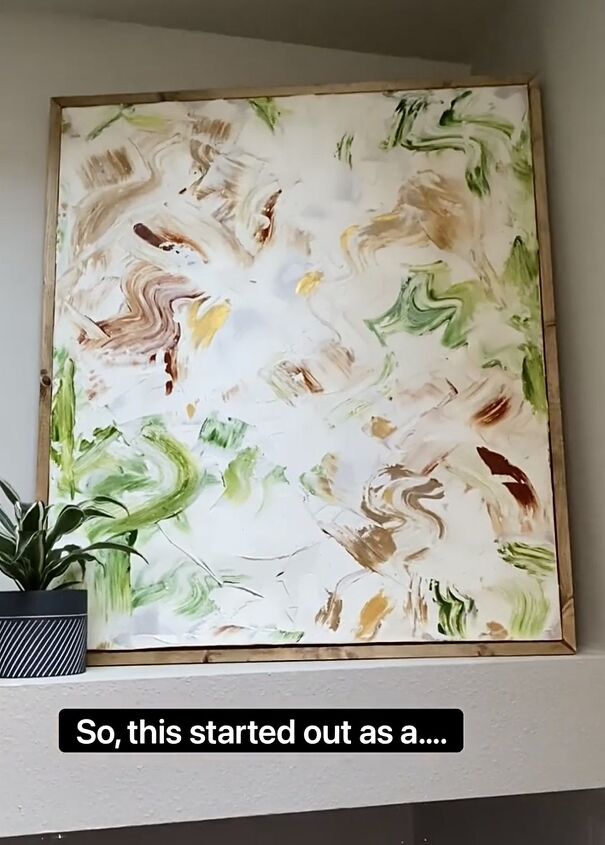
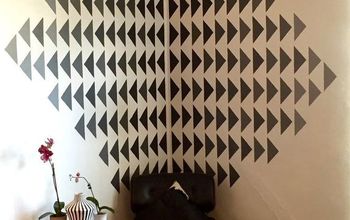
How to Make Joint Compound Art in a Few Easy Steps

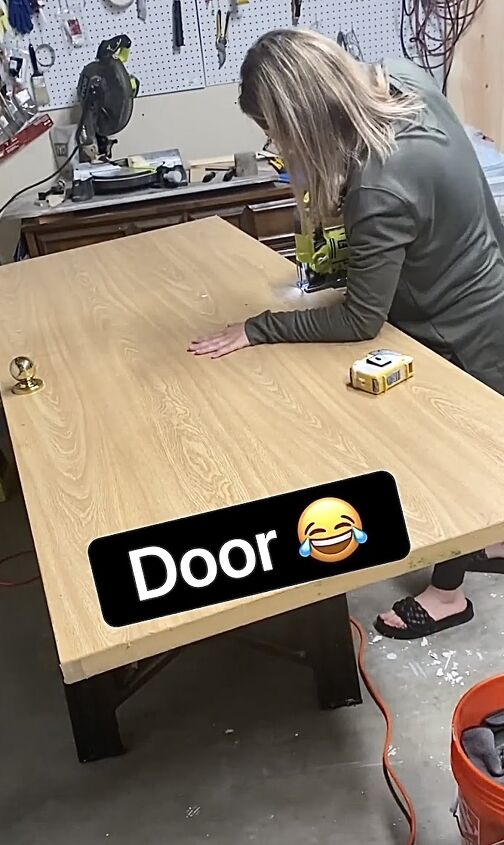
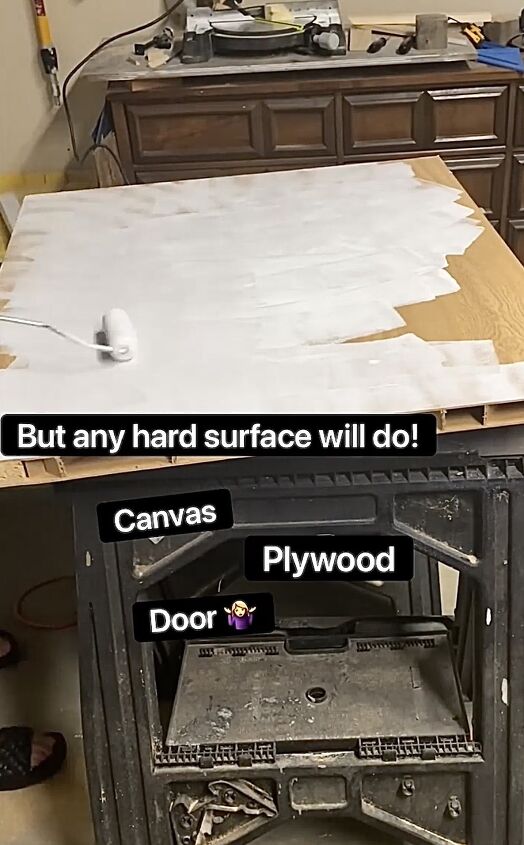
I am going to show you how to create a joint compound art using just a few materials and some creativity. The best part? We're turning an ordinary door into a masterpiece. Don't worry if you don't have a door – you can use any hard surface like canvas or plywood. So, let's get started on this exciting art project!
Tools and materials
- A door (or alternative hard surface like canvas or plywood)
- Joint compound
- Assorted paint colors
- Palette knife or putty knife
- Water (for cleaning palette knife)
- Disposable palette or mixing surface
- Drop cloth or newspaper (to protect your workspace)
- Old rags or paper towels
Steps
1. Prepare Your Workspace
Lay down a drop cloth or newspaper to protect your workspace from any mess. If you're using a door, ensure it's clean and free from dust or debris.
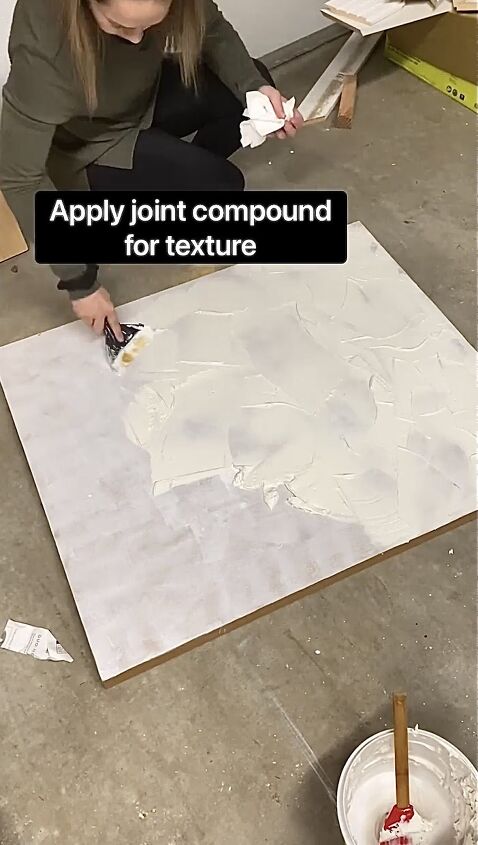
2. Apply Joint Compound for Texture
Apply joint compound evenly onto the surface of the door or chosen hard surface. Use the putty knife to create textures – you can go for smooth strokes or create interesting patterns. Allow it to dry according to the product's instructions.
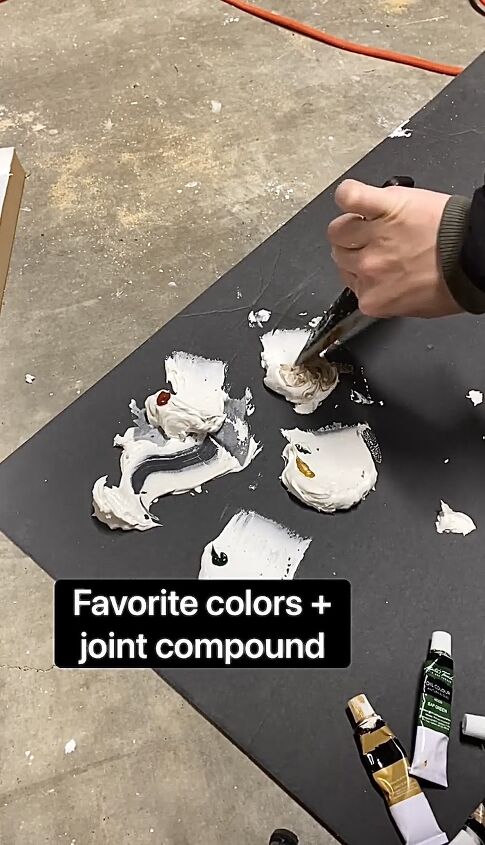
3. Mix Paint Colors with Joint Compound
Squeeze a portion of your favorite paint colors onto a disposable palette or mixing surface.
Gradually mix the paint colors with some of the joint compound. Adjust the ratio to achieve your desired level of color intensity and texture. Mix until you achieve a consistent texture and color.
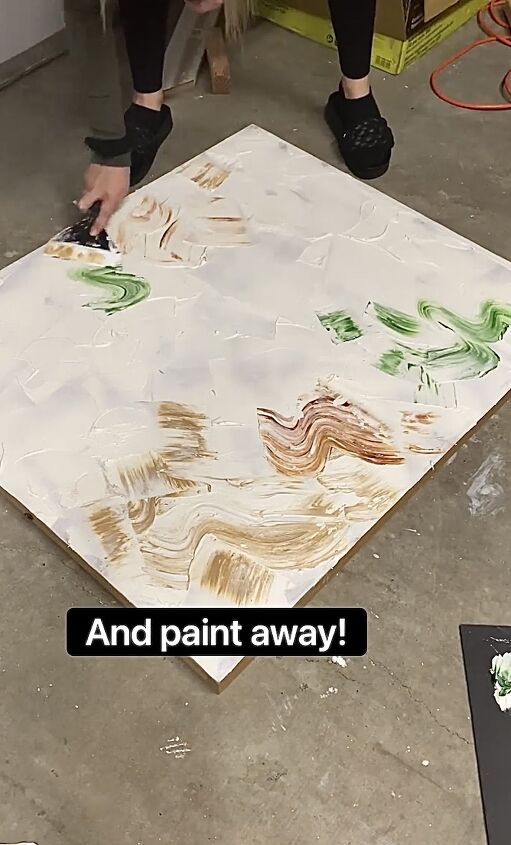
4. Paint Away with a Palette Knife
Take your mixed paint and joint compound mixture and load it onto a palette knife or putty knife.
Start applying the mixture onto the textured surface. Experiment with different strokes and layering techniques to create depth and interest in your artwork.
You can also use the palette knife to scrape away some areas, revealing the texture underneath or blending colors together. Let your creativity flow!
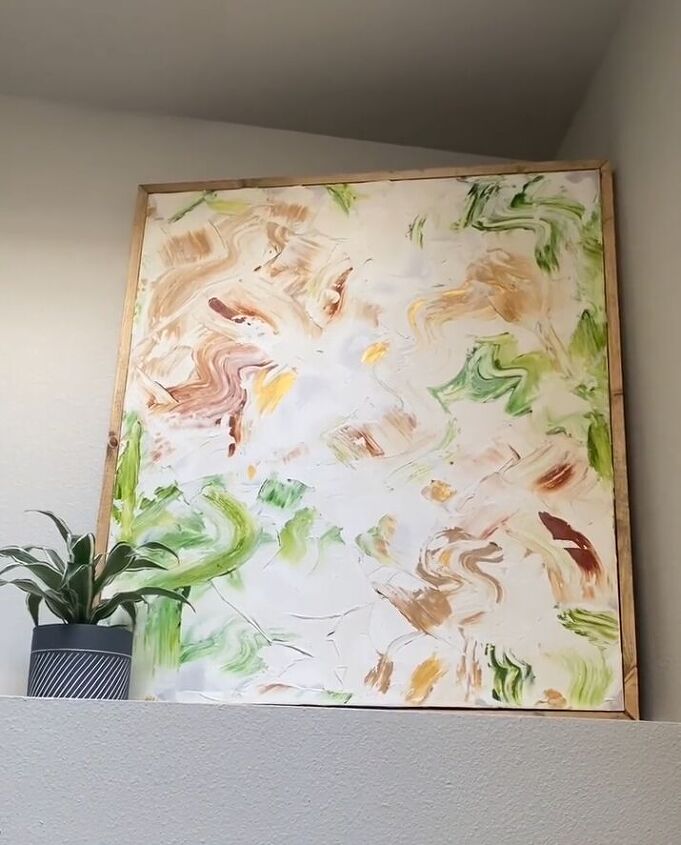
5. Let It Dry
Allow your artwork to dry completely. The drying time will depend on the type of joint compound and paint you've used.
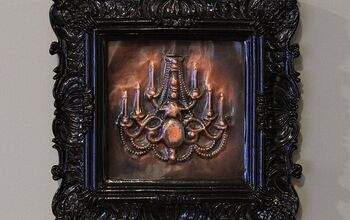
Joint compound art
Creating joint compound art is a fantastic way to add depth and dimension to your creative projects. Have you used joint compound for artistic projects? Share your ideas in the comments below.
Follow @gatheratthebooths on Instagram for more DIY ideas.
Comments
Join the conversation
-
Your take is lovely. Colors refreshing. Is it heavy?


Frequently asked questions
Have a question about this project?