


How to Paint an Arch on a Wall & Get the Perfect Shape

Do you want to know how to paint an arch on a wall? I added this inexpensive accent to a wall. While it took me a few tries to get the size right, the arch design was easy, quick, and the only cost is the paint you use.
I was able to get the perfect arch shape by using a little bit of string tied to a pencil! Let me show you how to paint arches on a wall.
Tools and materials
- Paint in your desired colors
- Paintbrushes
- Painter's tape
- Drop cloth or newspaper
- Measuring tape
- Pencil
- String
- Small nails or adhesive hooks
How to paint an arch on a wall
Step 1: Prep the area
Lay down a drop cloth or newspaper to protect your floor from any accidental spills.
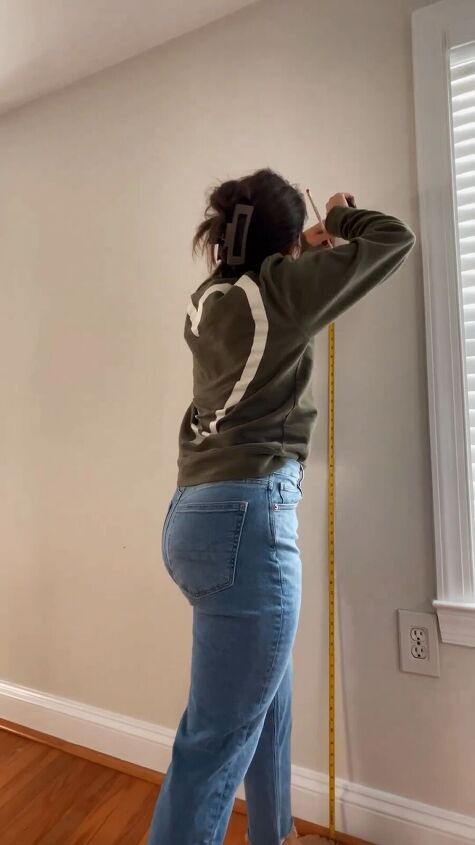
Step 2: Measure the wall
Start by measuring the height and width of the wall where you want to paint the arch. Use a measuring tape to get accurate dimensions.
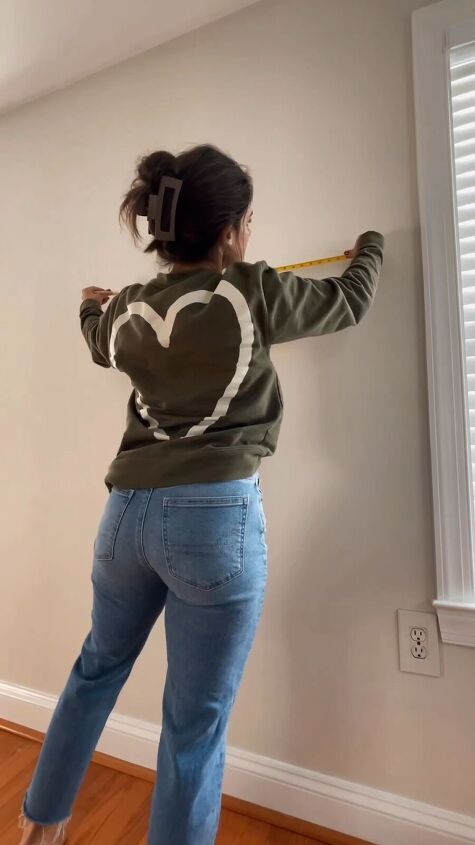
Step 3: Find the center
Locate the center of the wall by dividing the width measurement in half. Mark this point lightly with a pencil.
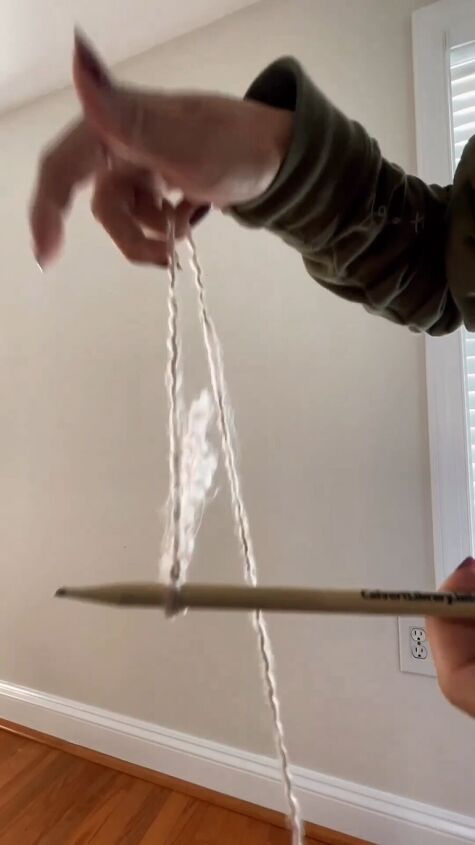
Step 4: Prepare the string and pencil
Cut a piece of string that is longer than the width of your arch. Tie one end of the string securely to the pencil.
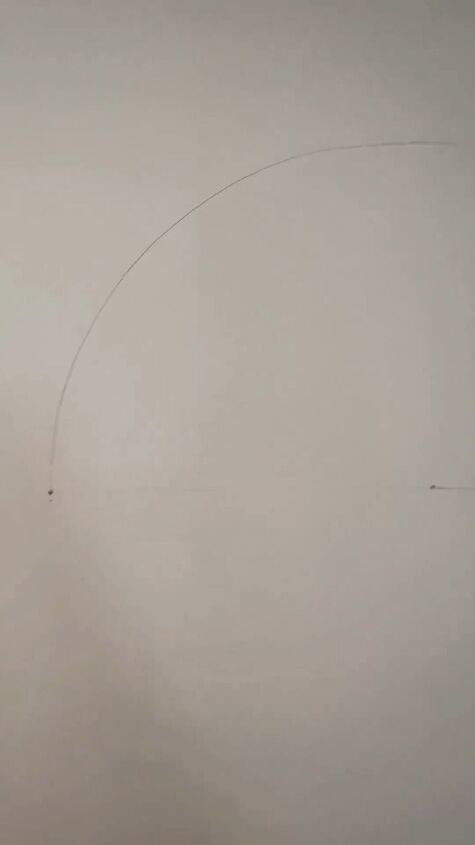
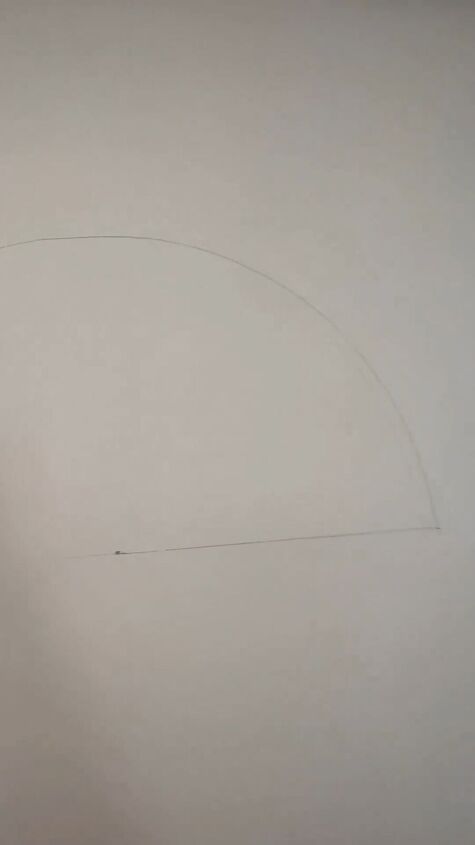
Step 5: Create the arch outline
Hold the string tight at the center point on the wall and extend the pencil to one side. Slowly swing the pencil in an arc from one side to the other, creating the outline of your arch. This
ensures a symmetrical and well-proportioned shape.
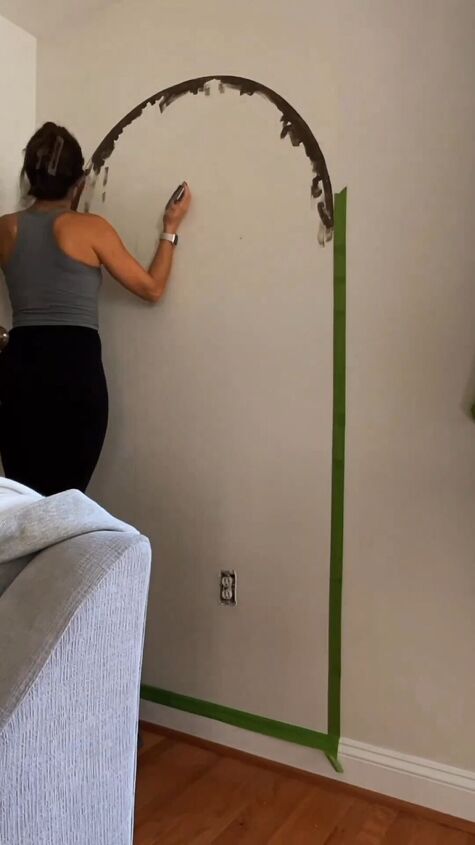
Step 6: Apply painter's tape
Carefully apply painter's tape along the edges of the arch outline. This will help create clean lines and prevent paint from bleeding onto the surrounding wall.
Step 7: Paint the outline
Use a paintbrush to carefully trace and fill in the arch outline with your chosen color. Take your time to ensure precision and neatness.
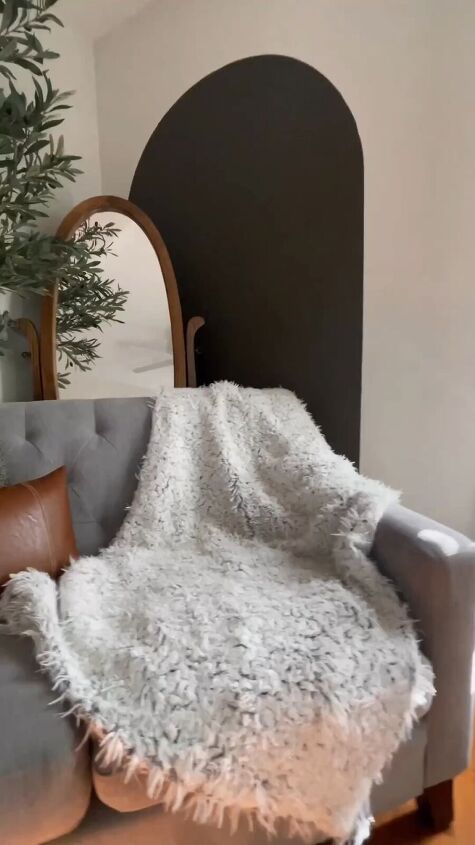
Step 8: Roll on the rest
Once the outline is complete and dry, use a paint roller to fill in the rest of the arch with the same or a different color. This method provides an even and smooth finish.
Step 9: Remove painter's tape
Wait for the paint to dry completely before carefully removing the painter's tape. This step helps reveal sharp and clean edges.
How to paint an arch on a wall
That’s all it takes to paint an arch on a wall! This simple DIY arch wall painting idea can add a touch of creativity and personality to any room in your home.
Let me know in the comments where and how you’ve painted arches in your home.
Follow @well_shetried on Instagram for more DIY ideas.


Frequently asked questions
Have a question about this project?